Each print job is different. You might require different materials, post-processings or have requirements regarding tolerances.
Selecting a Material, Service and Post-Processings
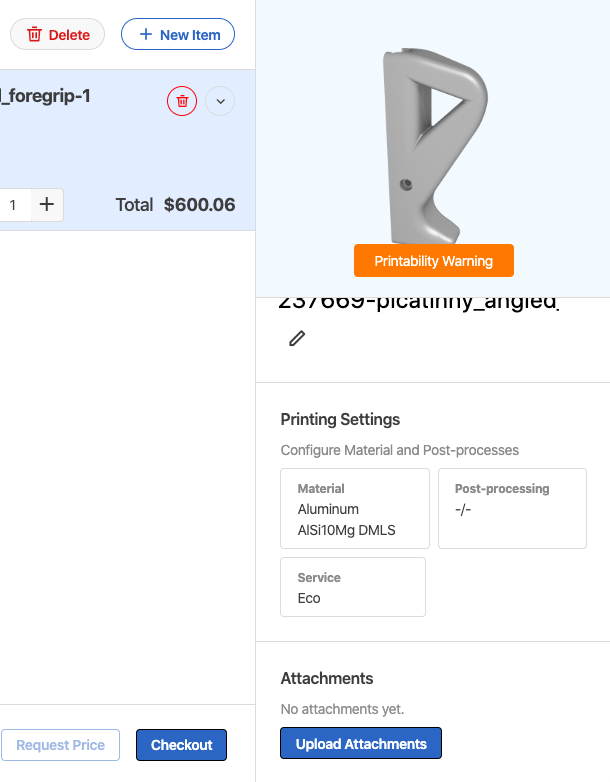
After uploading a file, you will see a list of Materials on the right. The price is calculated based upon the uploaded file. Choose one material for each part you uploaded. If you are unsure about which material to choose, you can do material comparison HERE (TODO).
Select the 3D Supplier after you select the Material. These will be automatically filtered to show only those companies that work with your selected material and ship to your address. Be aware that you can only order from one printing service at a time.
Select the Post-Processing for your model from the post-processing list. These will also be updated automatically based on the options provided by the chosen 3D Service. If you can’t find what you are looking for, choose a different
You can update the Quantity for each component at any point.
If you want to verify printability in detail, the model can be accessed in the Model Viewer by clicking on its image thumbnail.
Copy Order Settings to all 3D Models
Often the Material and 3D Service settings you apply to one file are actually consistent across an entire project.
To copy the settings across all 3D models:
Navigate to the 3D Model that has been correctly set up.
Click on the Options button in the upper right corner and select Clone settings to other items.
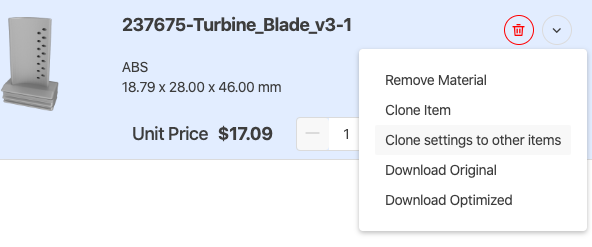
Now each model in this project will have the same settings and you can adjust only the specific settings that vary - such as a post-processing method.
Adding File Attachments
After selecting…your can… for…